
前言
Slack 是工程師常用的通訊軟體之一,能貼程式碼、分成多個頻道 (Channel) 管理等,比 Line 更適合在工作上應用,這次分享如何串 Slack 服務,並設定機器人傳送訊息
後續的文章會以此 repo 作為範例
介紹
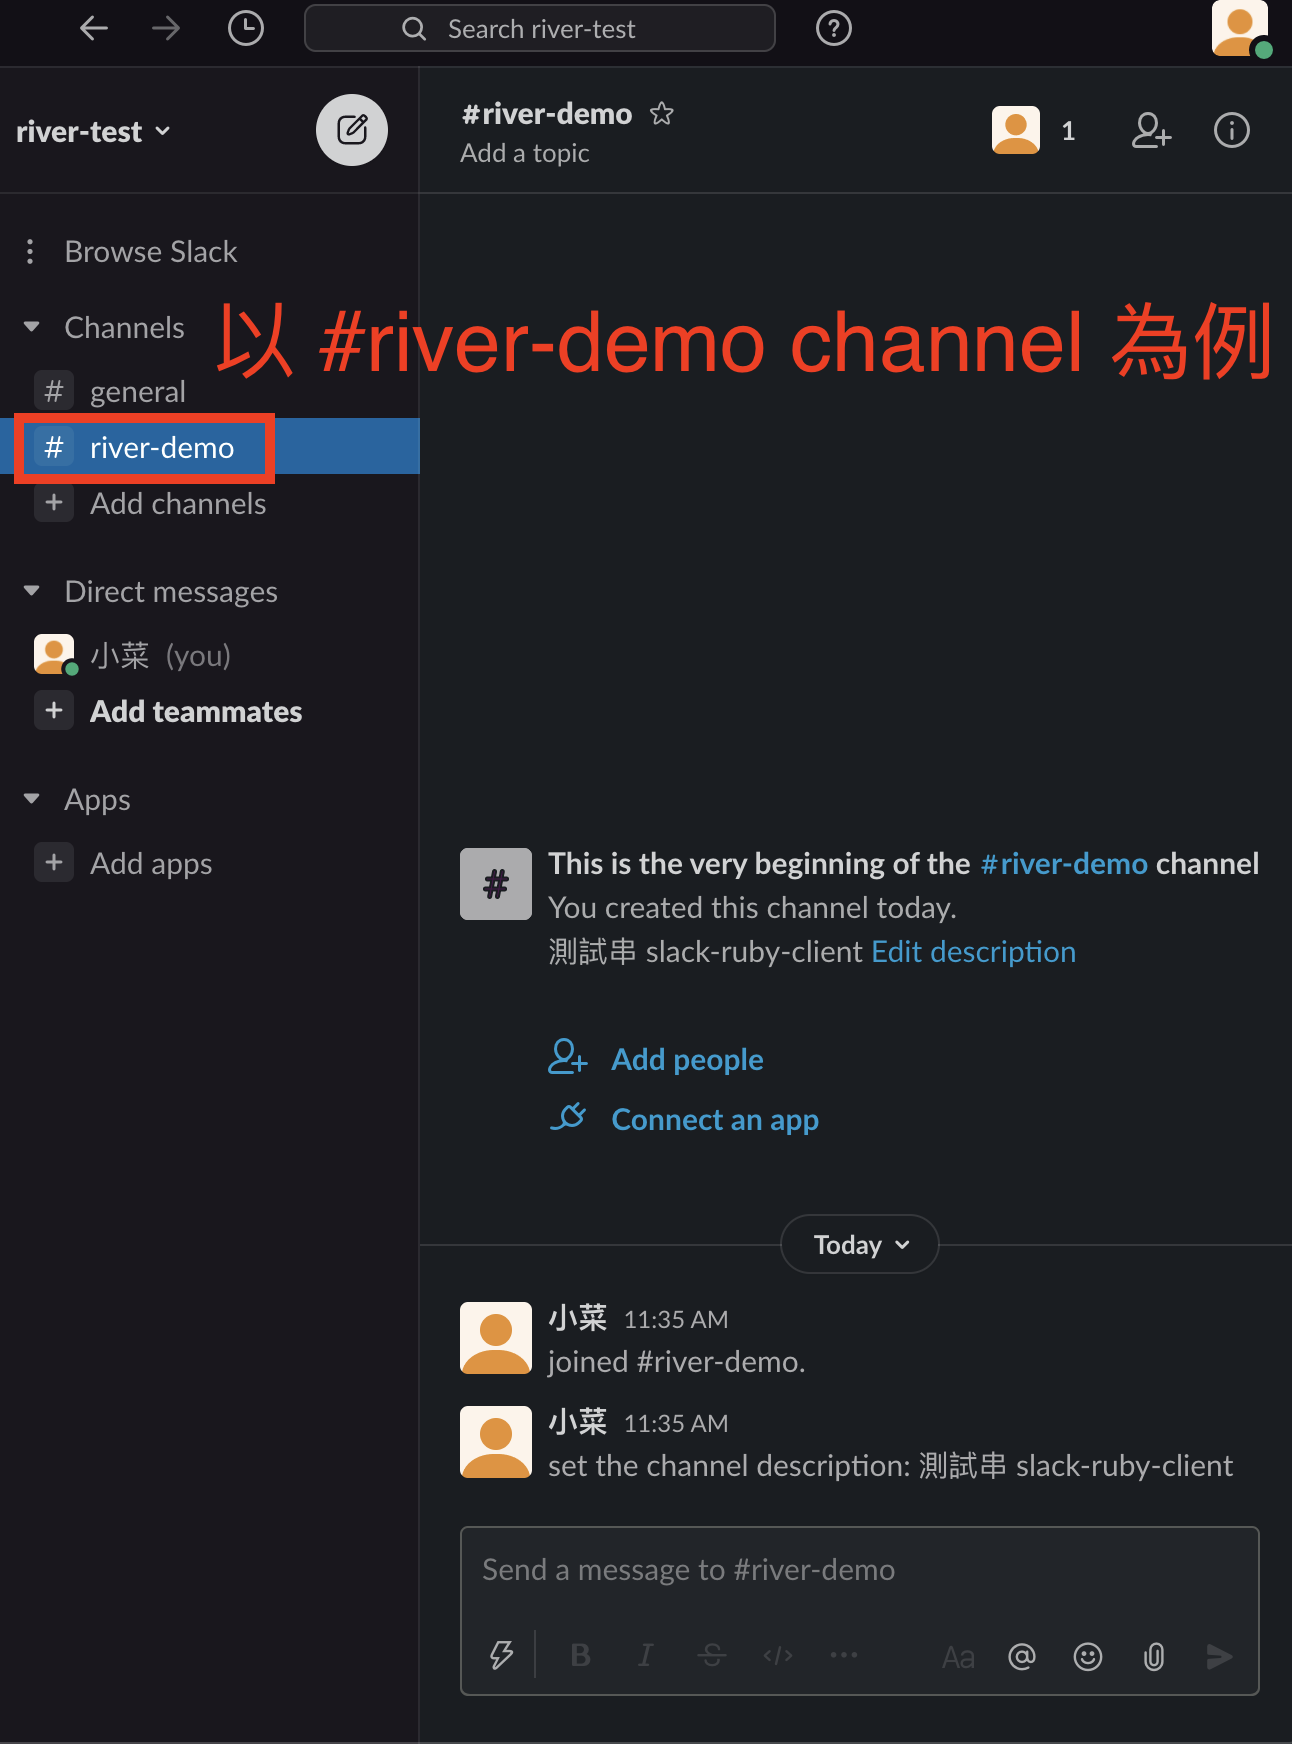
開始前,你要先有 Slack 帳號,若想測試的話,可創一人 workspace ,並新增頻道 (Add channels),以 river-demo 為例
這次會用到三個 Gem ,分別是
| No | Name | RubyGems | GitHub | Description |
|---|---|---|---|---|
| 01 | Slack Ruby Client | slack-ruby-client | click me | 可設定特定訊息傳到指定 Slack Channel , 比第 2 個複雜些 |
| 02 | slack-notifier | slack-notifier | click me | 可設定特定訊息傳到指定 Slack Channel , 比第 1 個簡單些,下載量比較高 |
| 03 | Exception Notification | exception_notification | click me | Exception 時有訊息通知,支援 Slack 等 |
備註: 其中 slack-ruby-client 與 slack-notifier 擇一安裝即可,那為何會介紹兩個類似的? 因為第一個已經寫完,索性都寫好惹 XD
如何安裝
一、slack-ruby-client
放在 Gemfile 中,可參考此 commit
1
2
3
4
5
# Gemfile
gem 'slack-ruby-client', '~> 0.15.1'
# 記得要 bundle
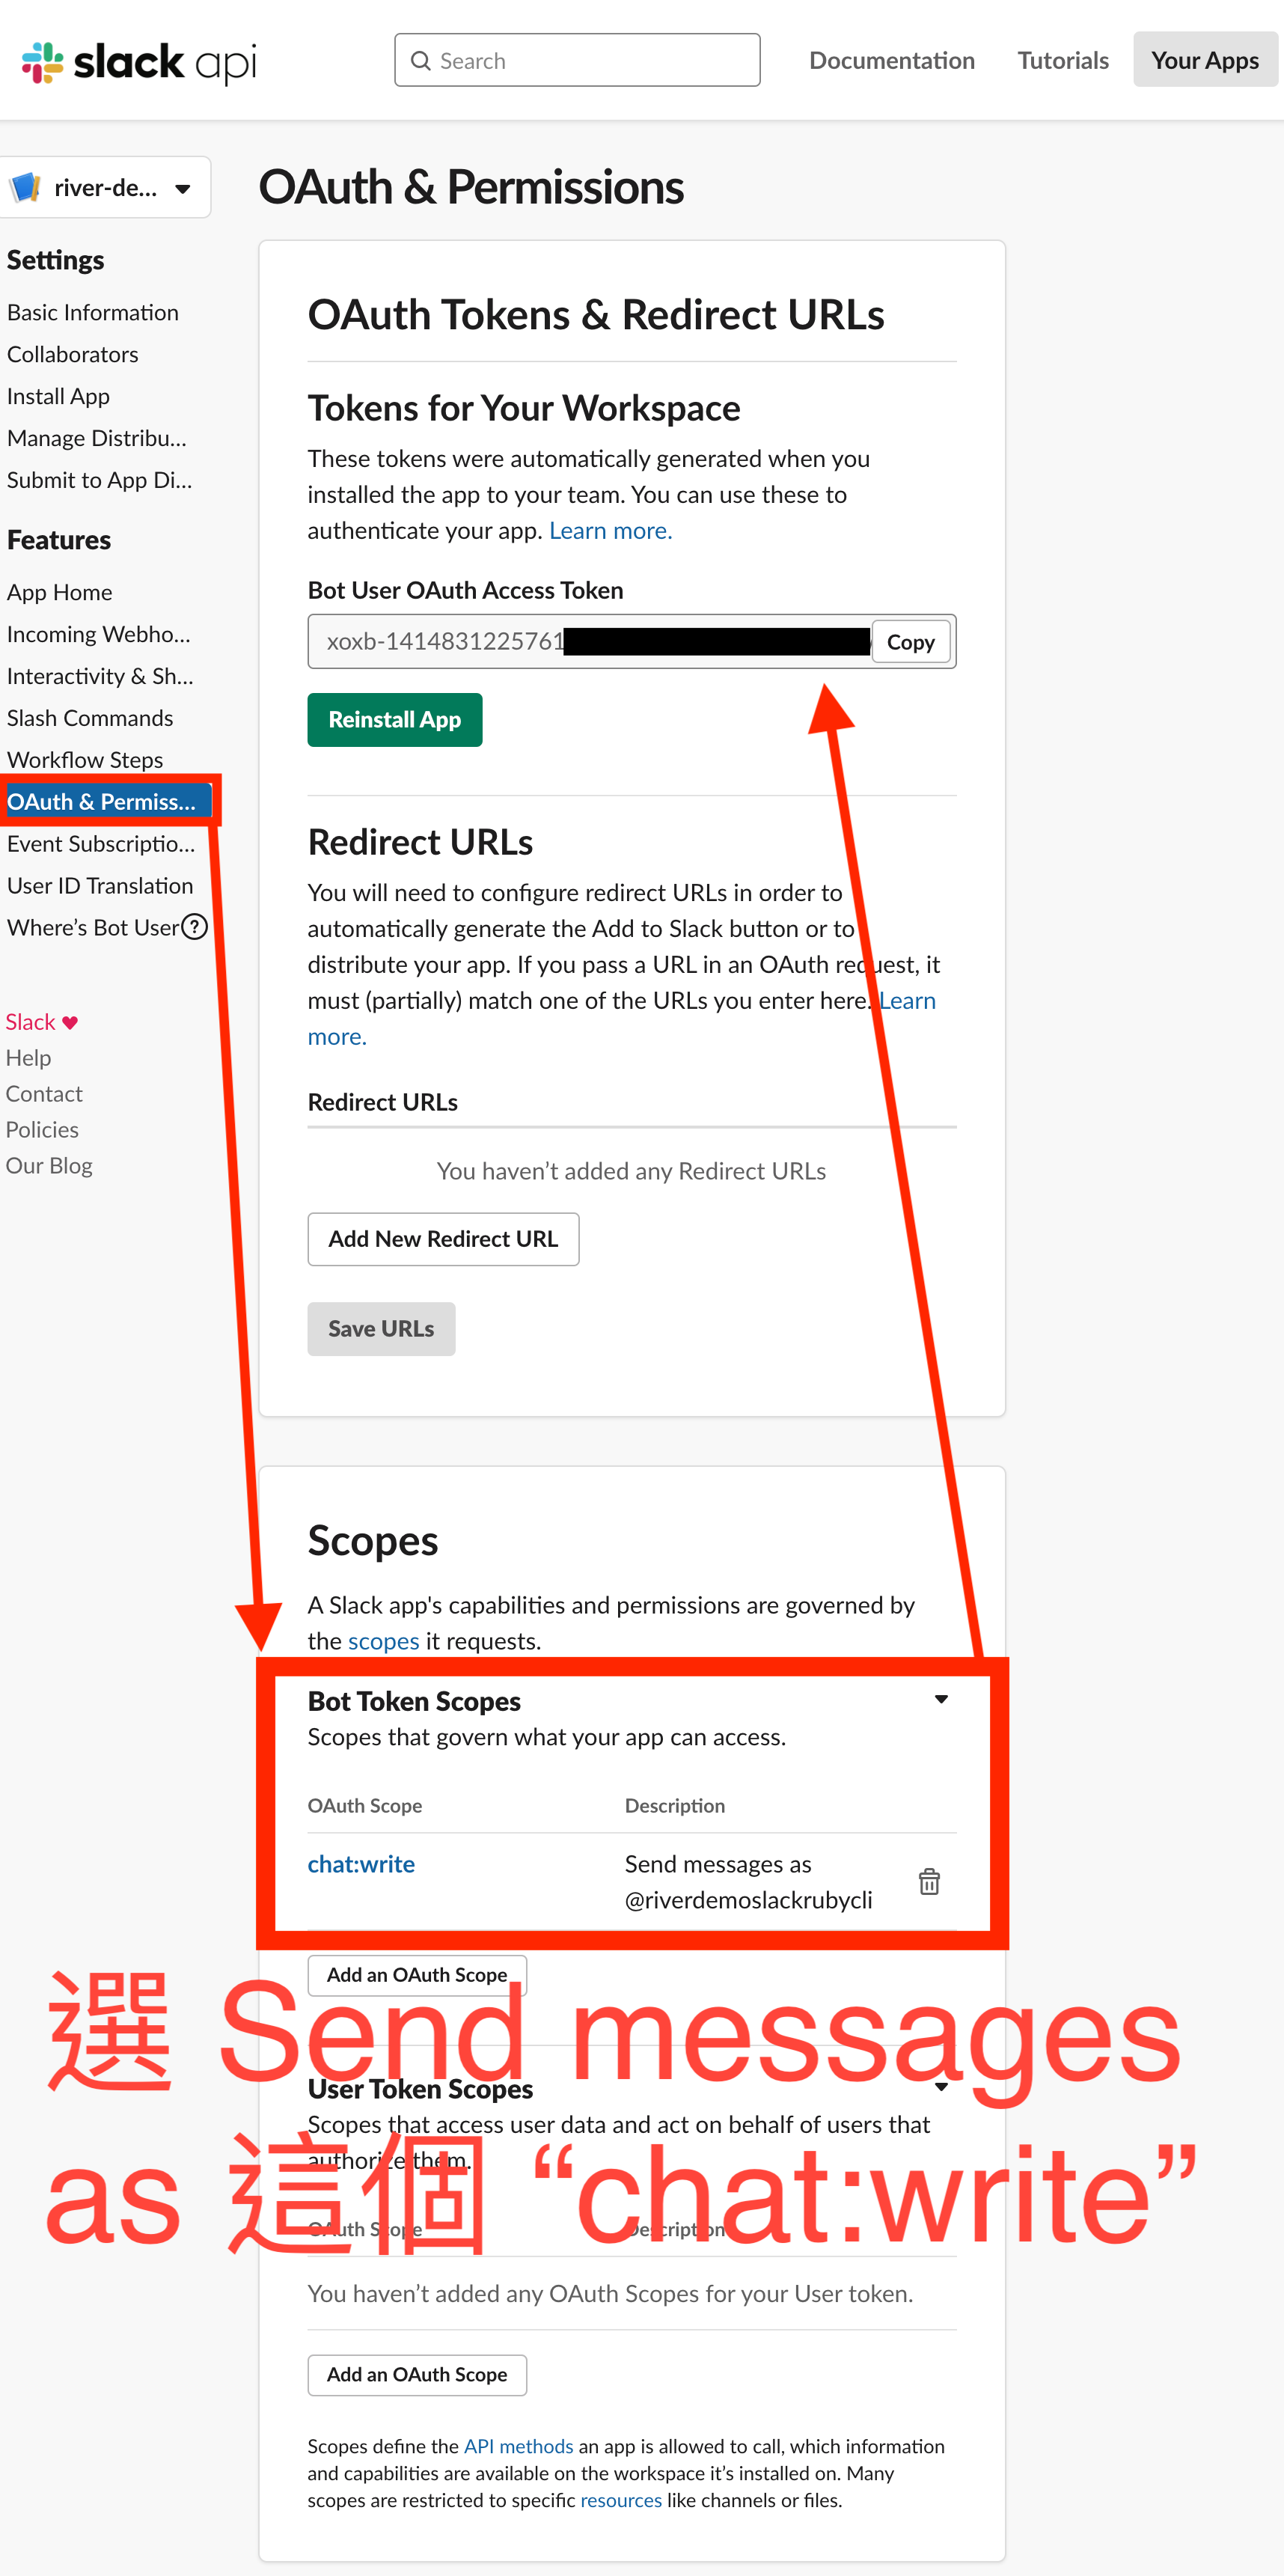
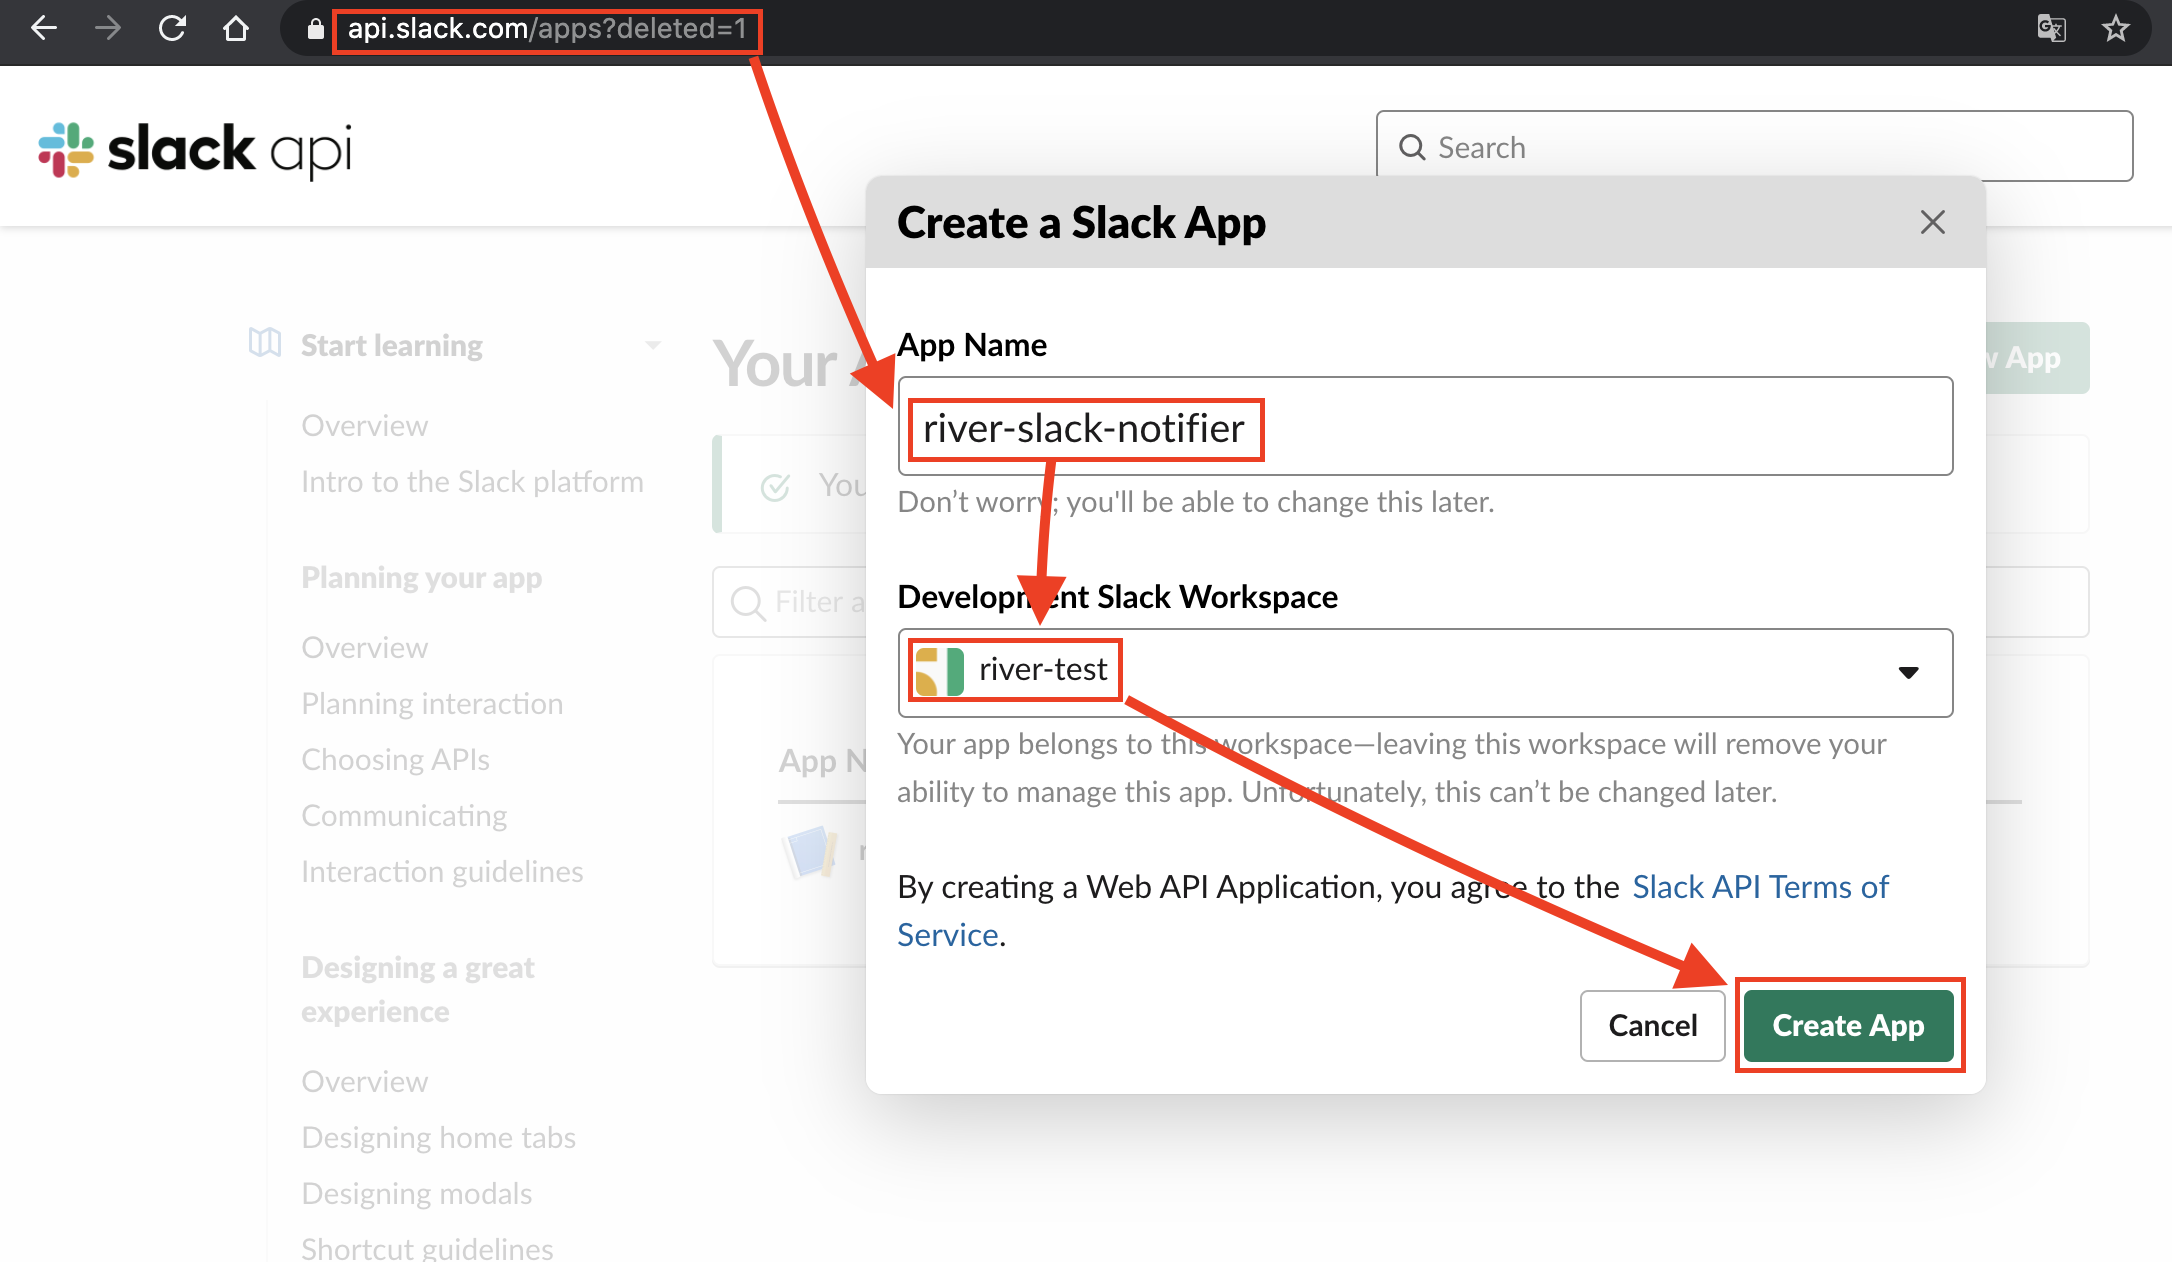
1. 接著到 Slack API 網站

2. 選「OAuth & Permissions」的「Bot Token Scopes」,並新增「Send messages as <你取的名稱>」,要是「chat:write」這個喔,完成後,拉到該頁面上面的「Tokens for Your Workspace」才能點「Install App to Workspace」這個按鈕,並取得一組「Bot User OAuth Access Token」
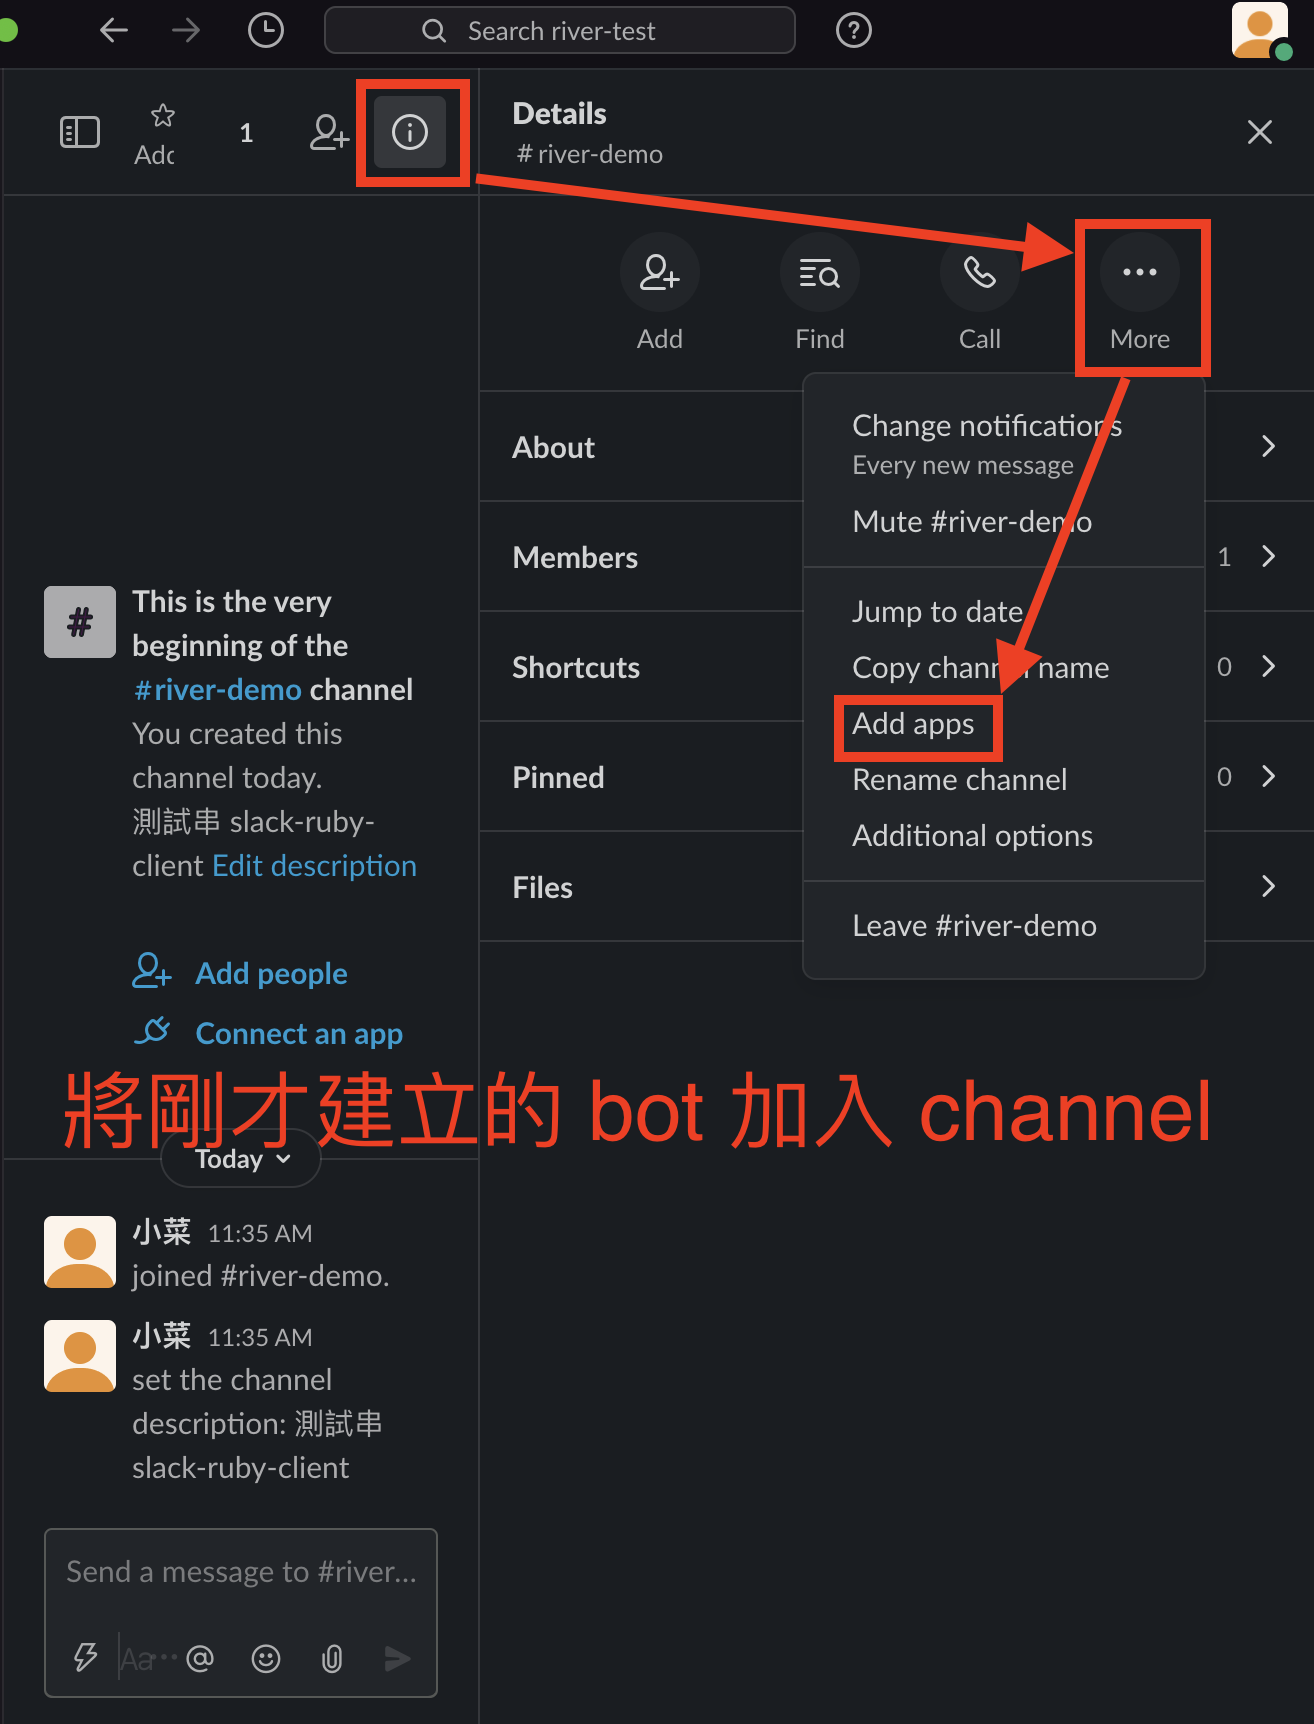
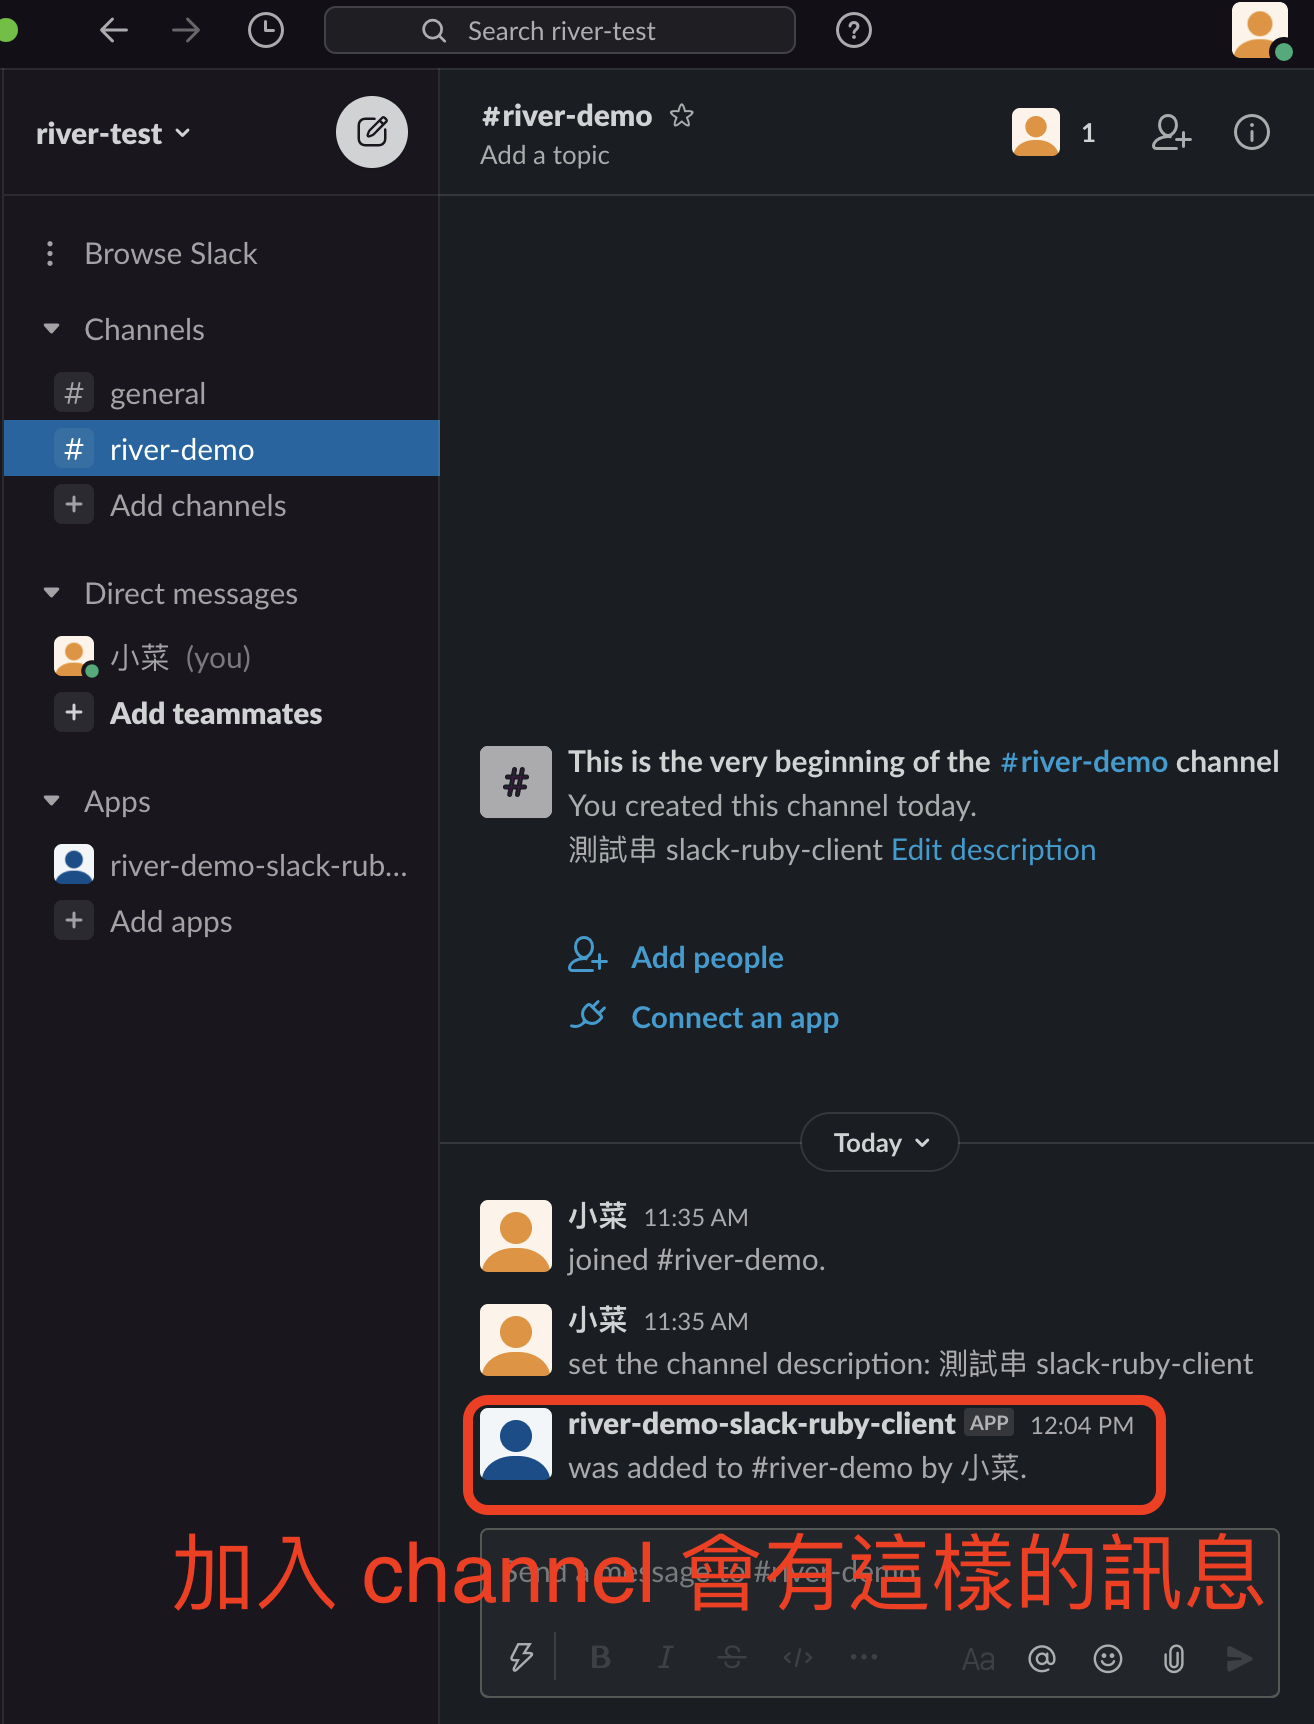
3. 回到 Slack App 的該頻道 (Channel),選右上角「Show channel details」「More」中的「Add apps」將建立的 Bot 加入至該頻道中
4. 將取得的 Slack token (Bot User OAuth Access Token) 放在專案中
1
2
3
4
5
6
7
8
# config/initializers/slack_bot.rb
require 'slack-ruby-client'
Slack.configure do |config|
config.token = 'xoxb-xxxxxx-xxxx-xxxx'
end
# 建議 token 不要直接貼在這,可放 ENV 或其他地方
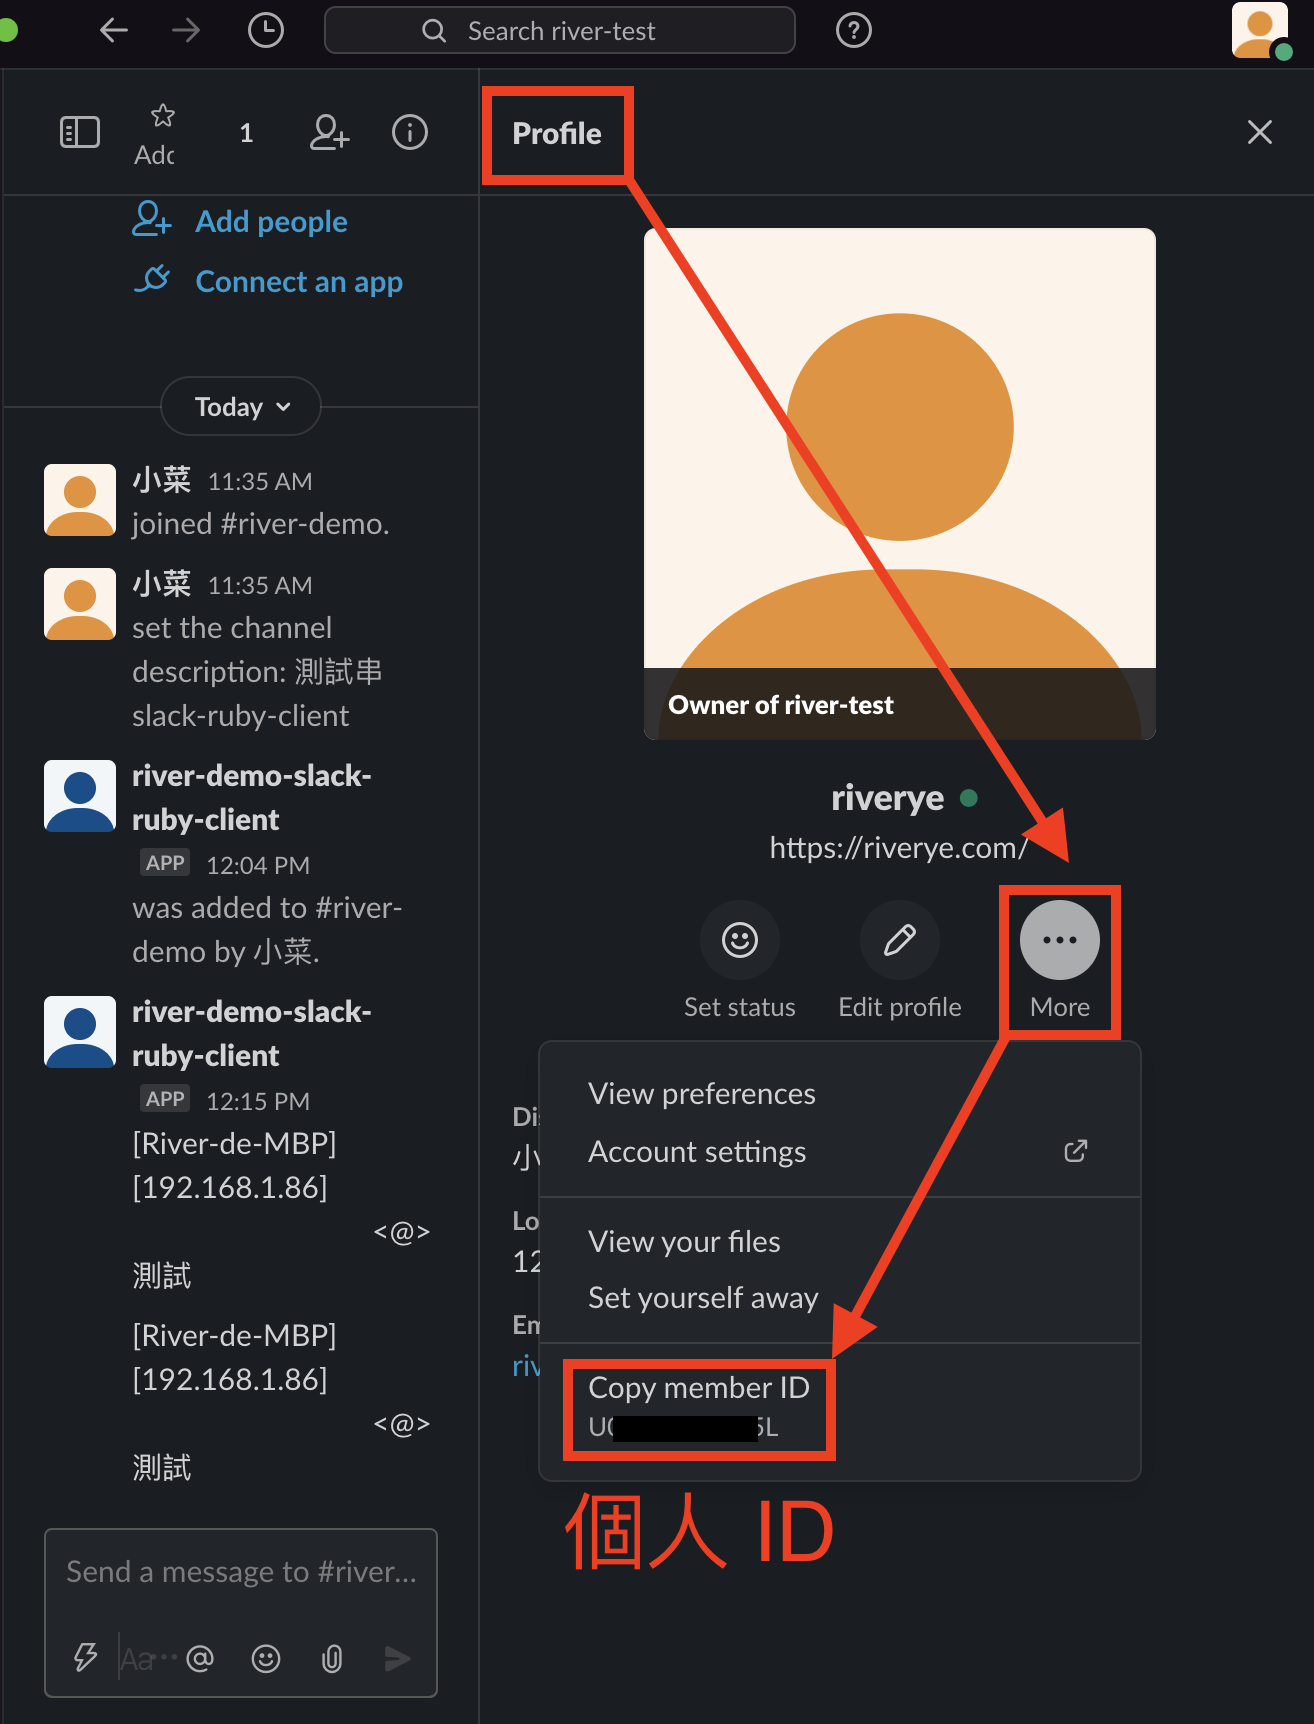
5. 若想 Tag 人的話,至「Profile」「More」便可看到「member ID」
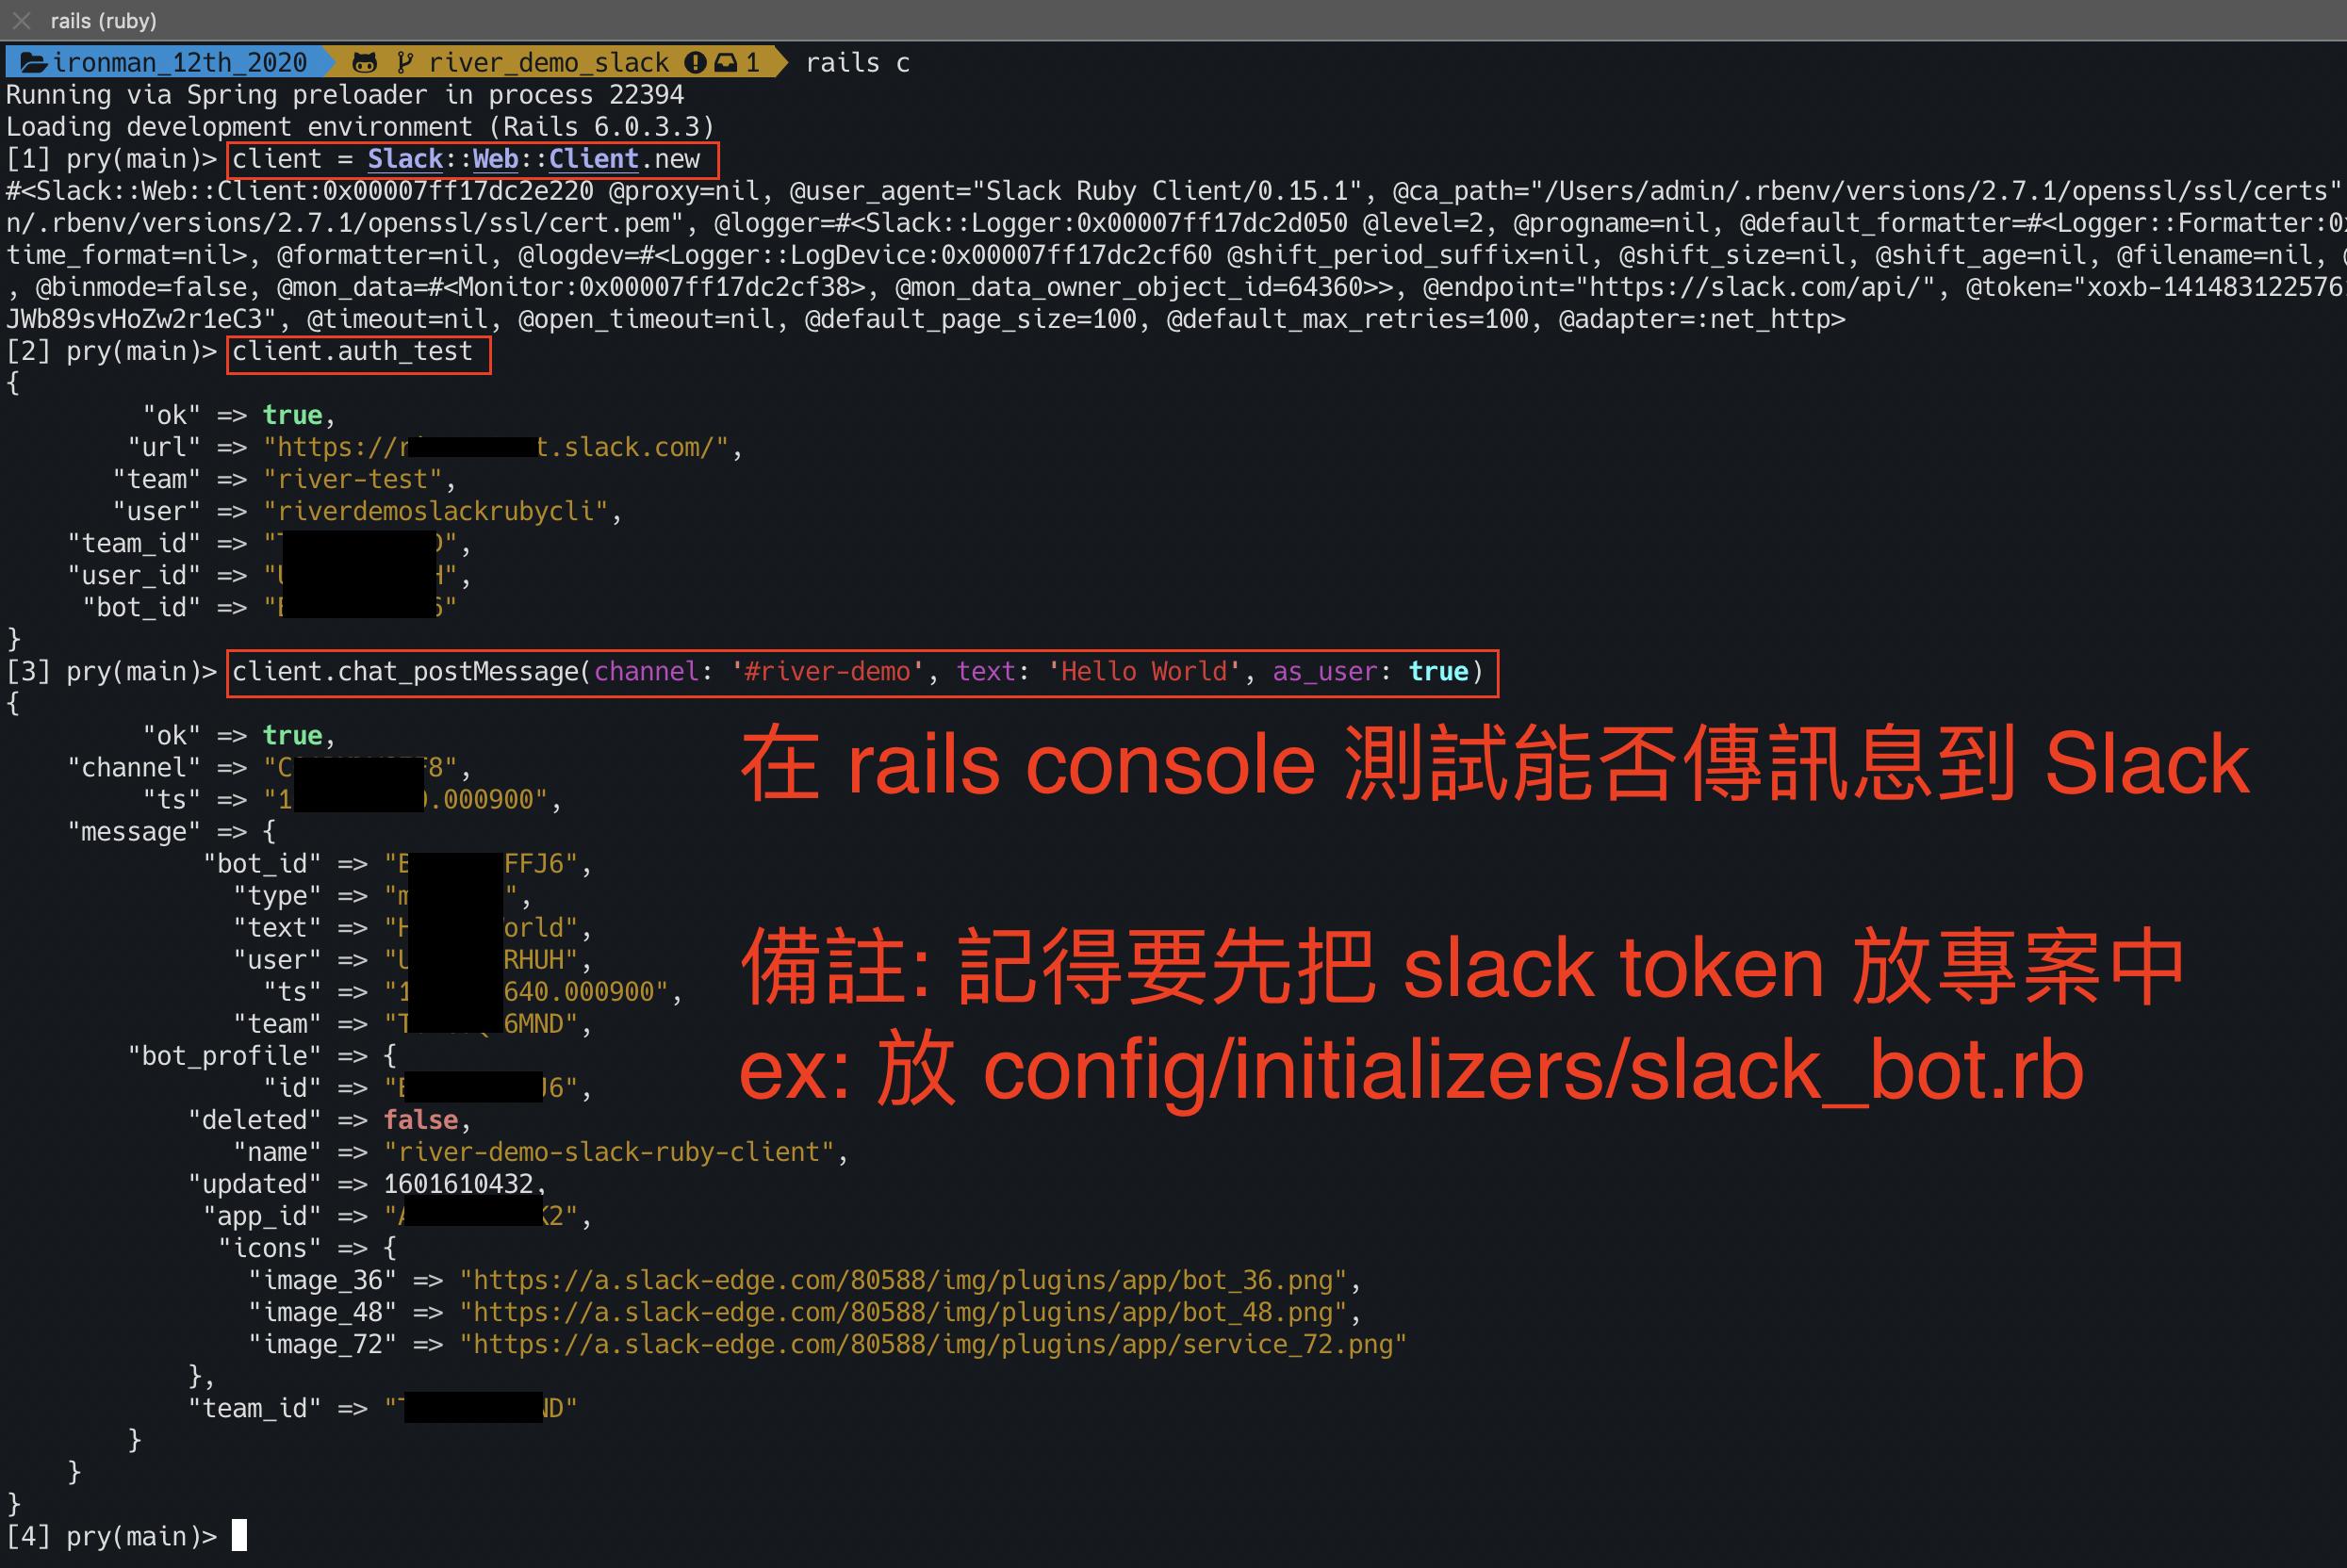
6. 在 rails console 測試,看能否正常傳送訊息
1
2
3
client = Slack::Web::Client.new
client.auth_test
client.chat_postMessage(channel: '#river-demo', text: 'Hello World', as_user: true)
7. 確認可以傳送訊息後,示範寫在 Sidekiq worker 執行,可參考此
1
2
3
4
5
6
7
8
9
10
11
12
13
14
15
16
17
18
19
20
21
22
23
24
25
26
27
28
29
30
31
32
33
34
35
36
37
38
39
40
41
42
43
44
45
46
47
48
49
50
51
52
53
54
55
56
57
58
59
# config/initializers/slack_bot.rb
require 'slack-ruby-client'
Slack.configure do |config|
config.token = Rails.application.secrets.slack[:slack_api_token]
end
# ---
# config/secrets.yml
development:
slack:
slack_api_token: 'xoxb-xxxxxx-xxxx-xxxx'
river: 'UXXXXXX4'
test:
production:
slack:
slack_api_token: ''
river: ''
# ---
# config/sidekiq.yml
- ['robot', 5]
# ---
# app/worker/slack_bot_worker.rb
class SlackBotWorker
include Sidekiq::Worker
sidekiq_options queue: 'robot', retry: 3
DEFAULT_CHANNEL = 'river-demo'
SLACK_ID_TABLE = { river: Rails.application.secrets.slack[:river] }.freeze
def perform(msg, options = {})
hostname = Socket.gethostname
ip_address = Socket.ip_address_list.find { |ai| ai.ipv4? && !ai.ipv4_loopback? }.ip_address
slack_bot = Slack::Web::Client.new
channel = options['channel'].presence || DEFAULT_CHANNEL
names = options['names'].present? ? [options['names']].flatten : []
names_tags = names.map { |name| "<@#{SLACK_ID_TABLE[name.to_sym]}>" }.join('')
slack_bot.chat_postMessage(
channel: channel,
text: "[#{hostname}][#{ip_address}] #{names_tags}#{msg}",
as_user: true,
)
end
end
# ---
# app/controllers/users_controller.rb
# 想 Tag 人的話
SlackBotWorker.perform_async('Hello World', names: 'river')
# 不想 Tag 人的話
SlackBotWorker.perform_async('Hello World')
參考資料
二、slack-notifier
放在 Gemfile 中,可參考此 commit
1
2
3
4
5
# Gemfile
gem 'slack-notifier', '~> 2.3', '>= 2.3.2'
# 記得要 bundle
1. 接著到 Slack API 網站
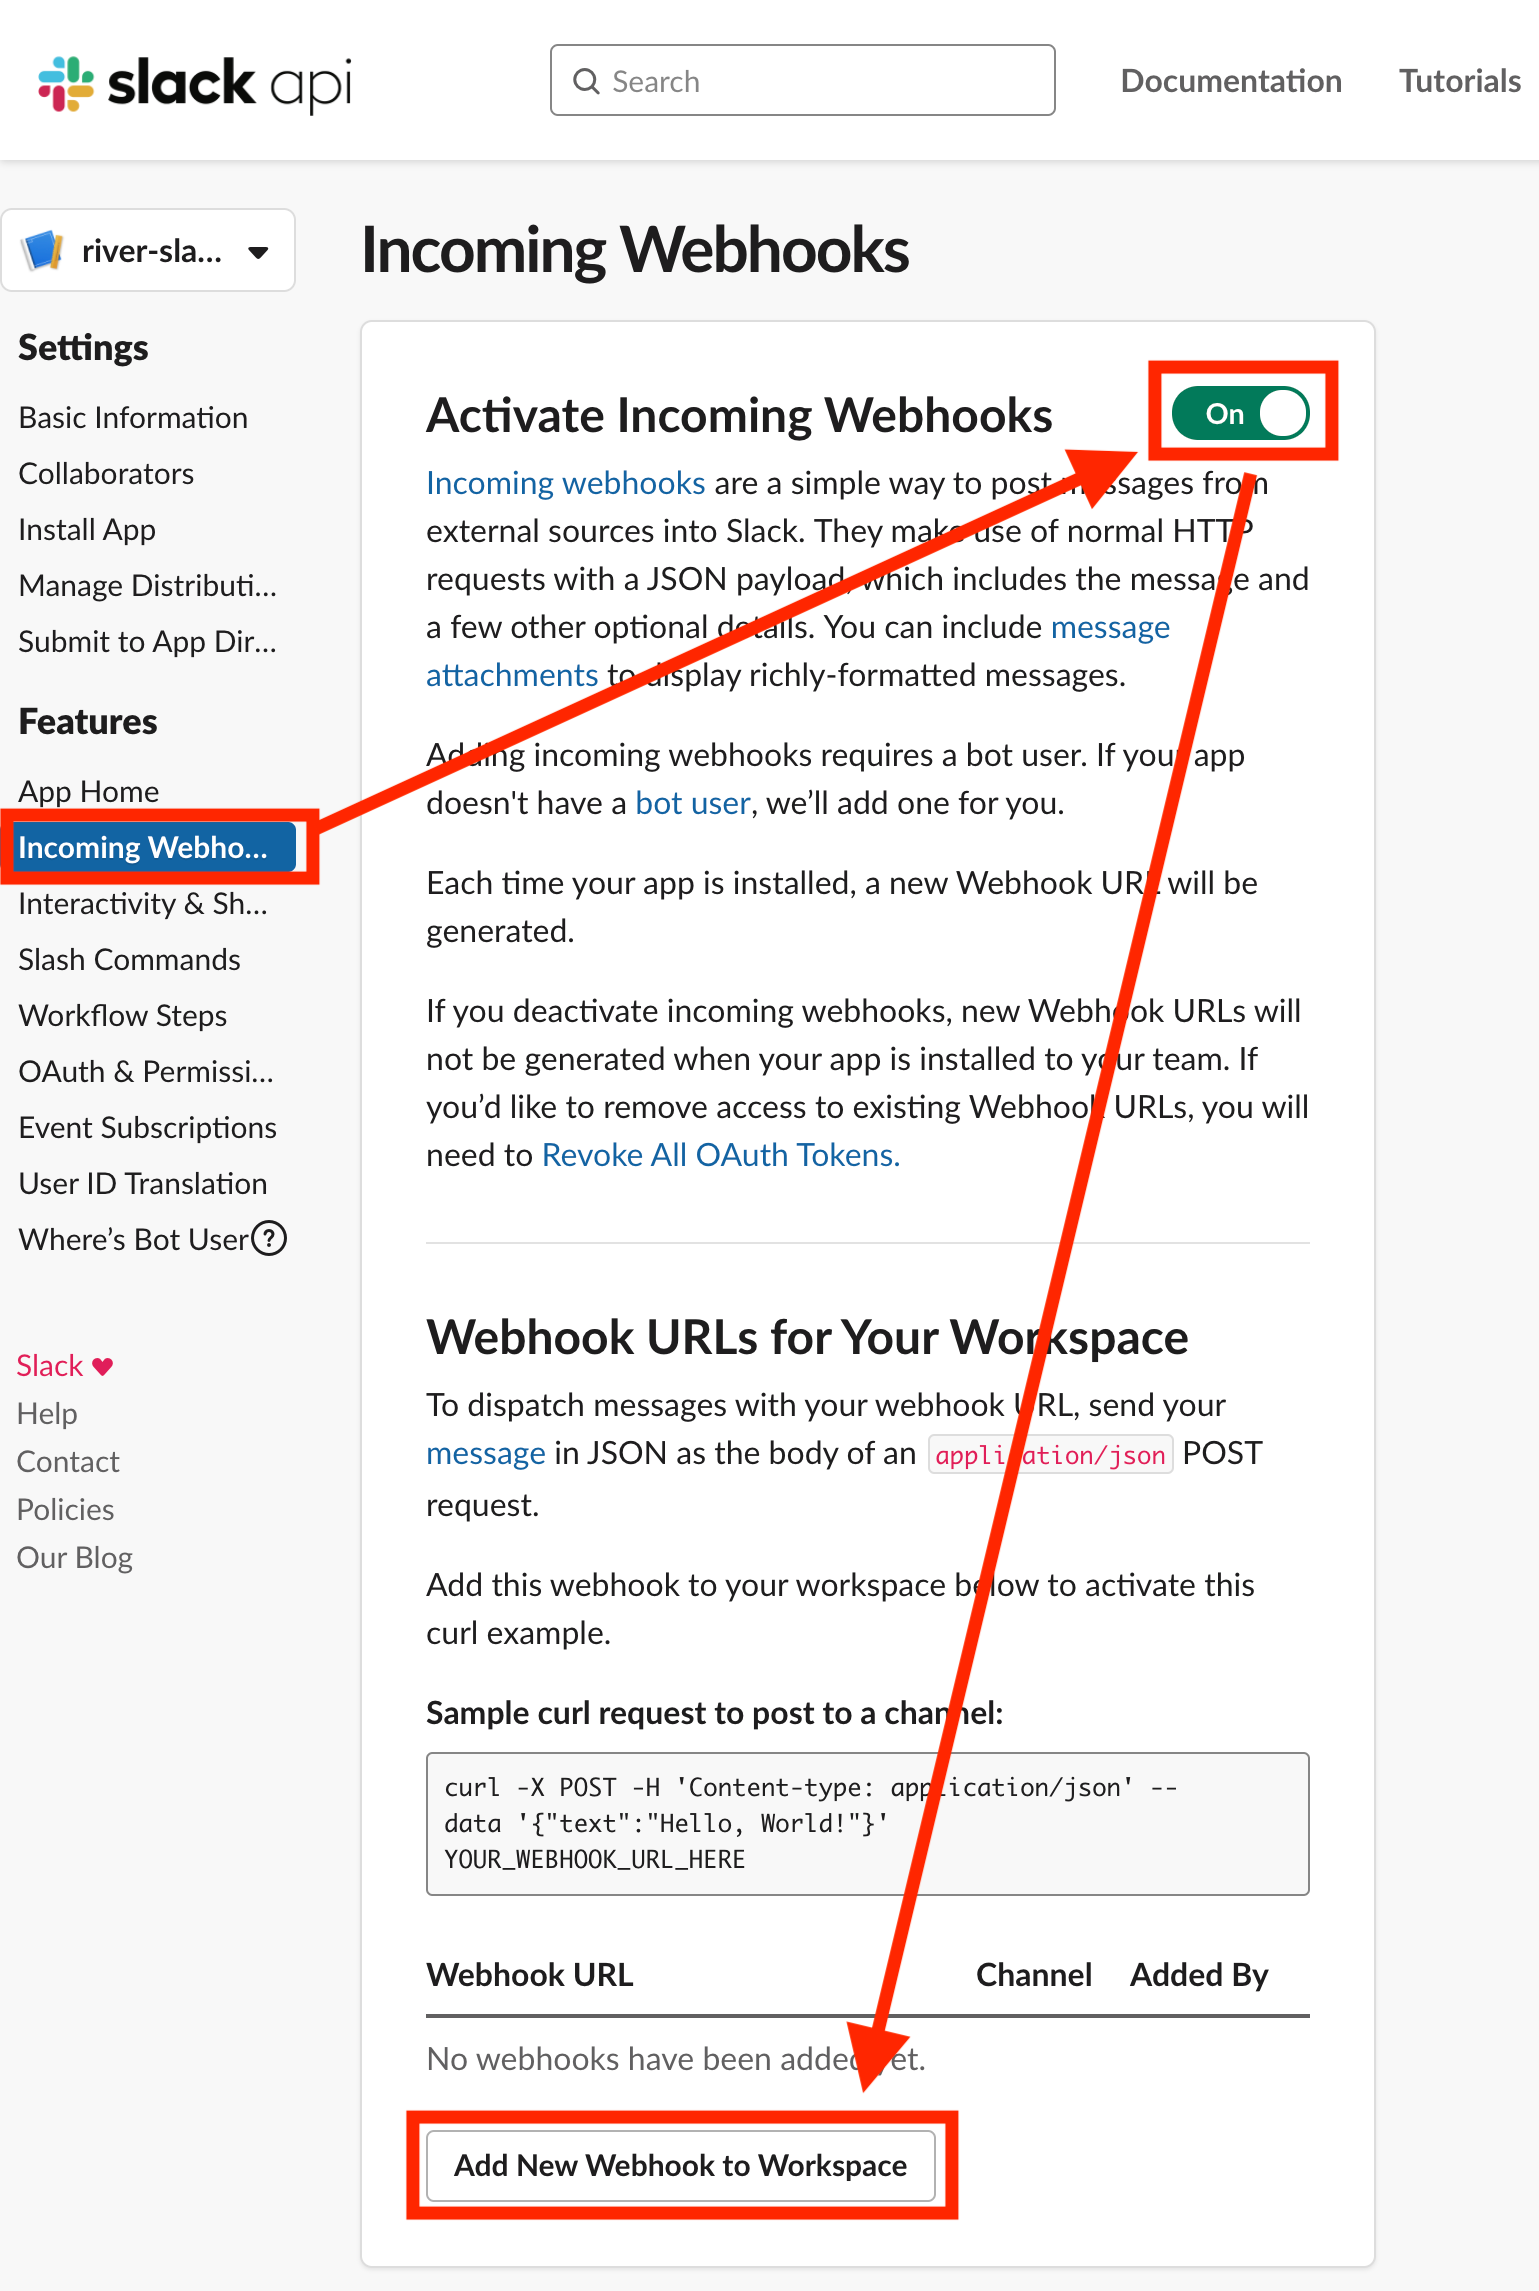
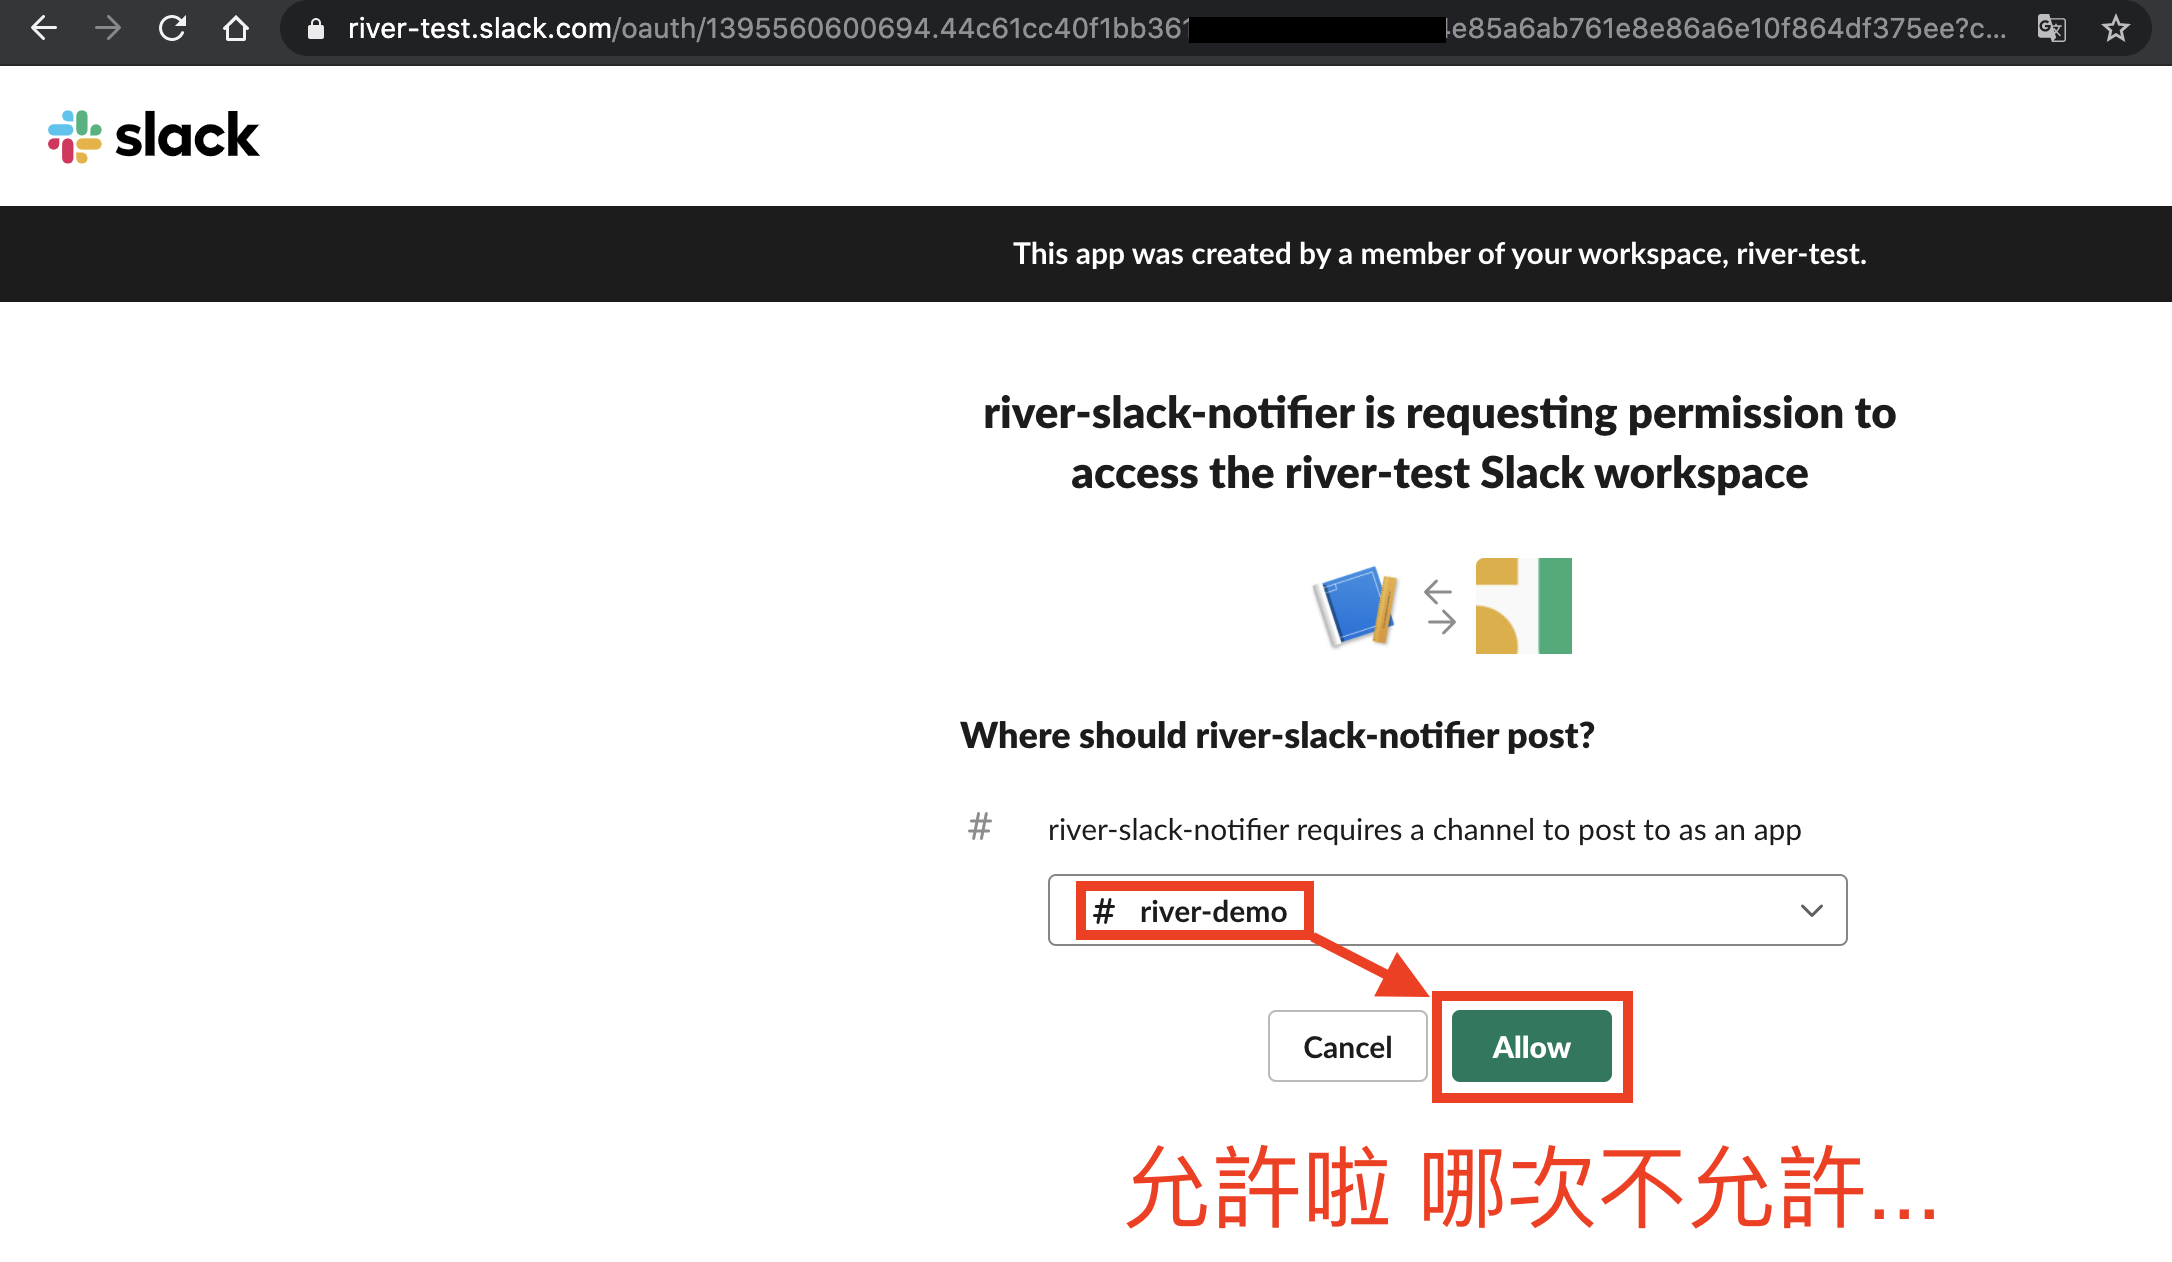
2. 選「Incoming Webhooks」將「Activate Incoming Webhooks」開啟,並點「Add New Webhook to Workspace」按鈕
3. 選「Allow」 (謎之聲,允許啦,哪次不允許 XD
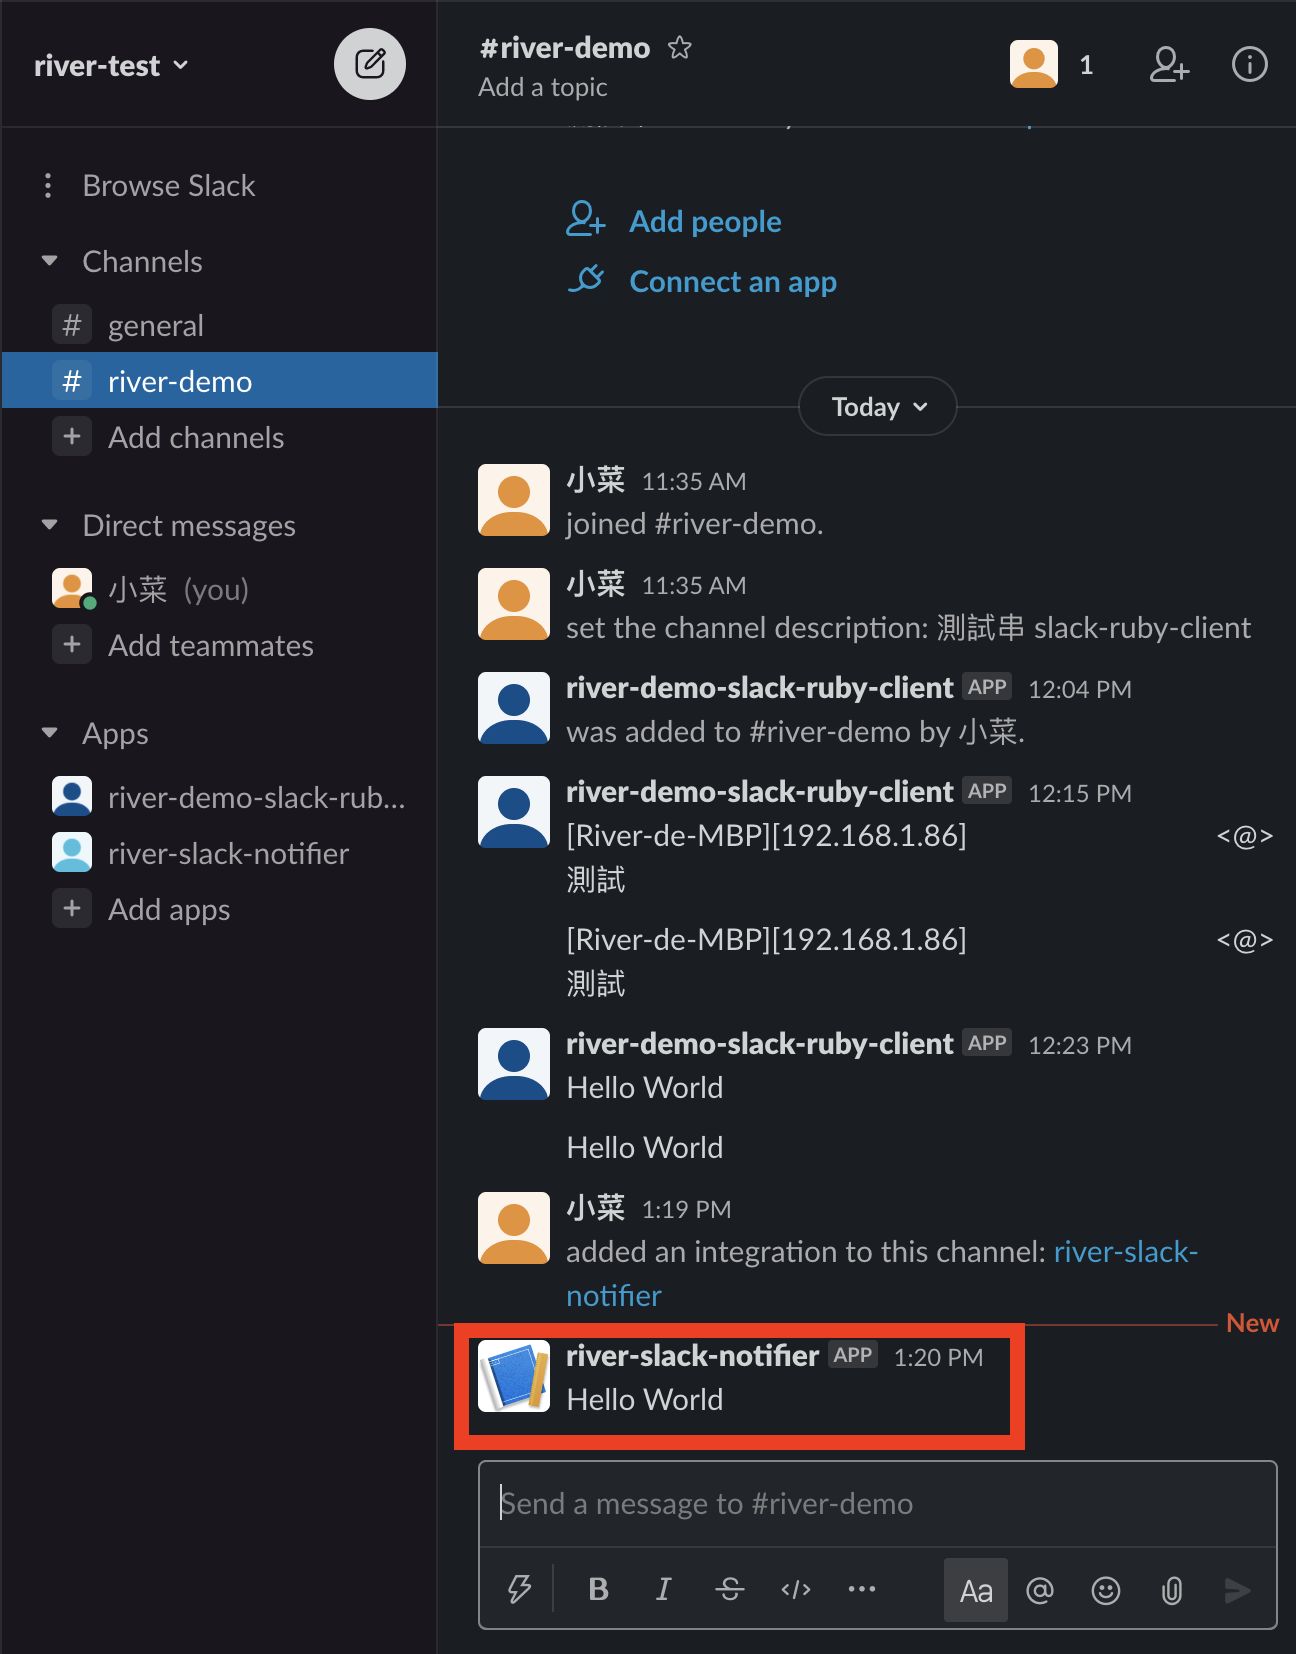
4. 將取得「Webhook URL」複製,在 rails console 測試
1
2
3
4
5
notifier = Slack::Notifier.new "https://hooks.slack.com/services/xxxx/xxxx/xxxx"
notifier.ping "Hello World"
# 就是這麼簡單 XD
# 這個就不寫範例了...
三、exception_notification
放在 Gemfile 中,可參考此 commit
1
2
3
4
5
# Gemfile
gem 'exception_notification', '~> 4.4', '>= 4.4.3'
# 記得要 bundle
將剛才取得的 Slack Webhook URL 放在 exception_notification.rb ,可參考此 commit
備註: 也可將 Webhook URL 放別的地方
1
2
3
4
5
6
7
# config/initializers/exception_notification.rb
Rails.application.config.middleware.use ExceptionNotification::Rack, slack: {
webhook_url: 'https://hooks.slack.com/services/xxx/xxx',
channel: 'river-demo',
}
# 可直接將 Rails.application.secrets.slack[:webhook_url] 換成 Webhook URL
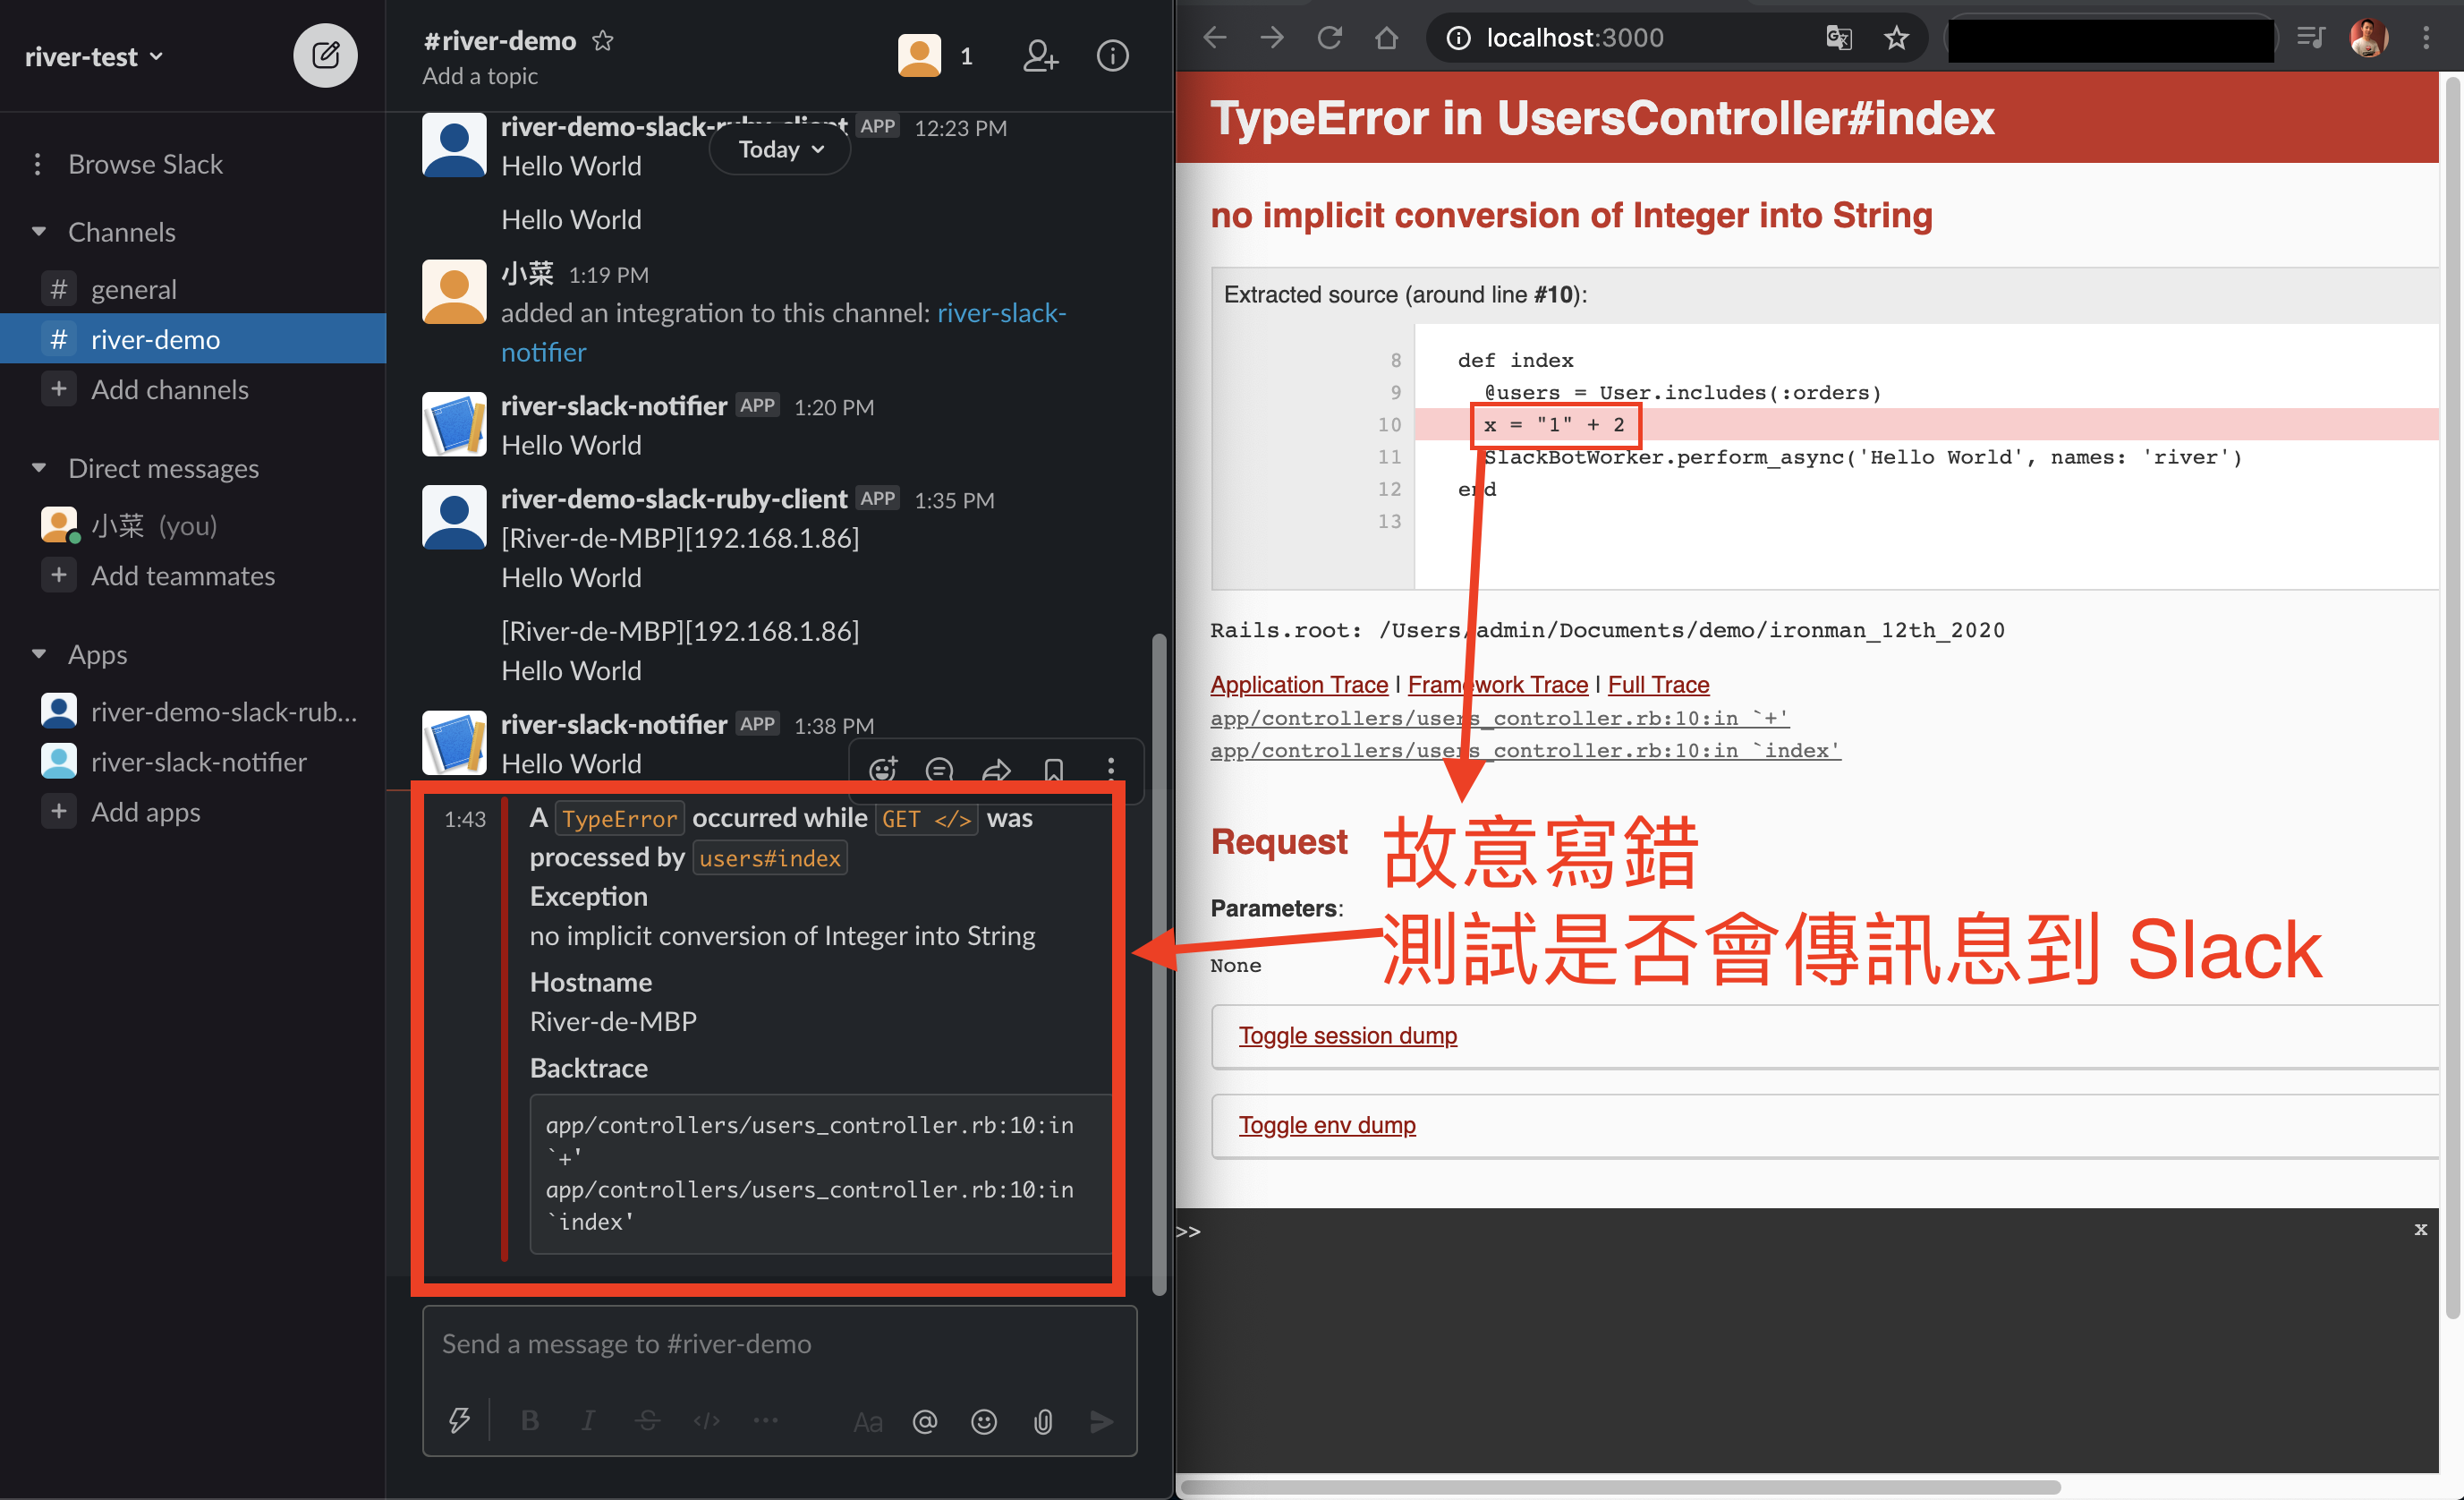
小結
想省事的話,可直接用 slack-notifier 這個 Gem 即可,步驟簡單,再寫一個 worker 處理即可,有了 exception_notification 後,發生預期外的錯誤訊息時,Slack 會即時通知,也能增加 Email 通知 (可至官方 GitHub 看文件,蠻簡單的),三個 Gem 的使用皆是看文件寫出來的,記得,別把 Token 或密碼暴露在公開場合,包括不要 push 到 GitHub 或 GitLab 上...
鐵人賽這系列文章接近尾聲,有幫助到你的地方,可在底下留言,有任何錯誤也歡迎指正,我會很感激的!!
鐵人賽文章連結:https://ithelp.ithome.com.tw/articles/10247920
medium 文章連結:https://link.medium.com/tYwlNOicgab
本文同步發布於 小菜的 Blog https://riverye.com/
備註:之後文章修改更新,以個人部落格為主